
I noticed my series on WordPress plugins misses widgets. It’s a good fortune because I needed to show some social icons in the sidebar.

This is how the widget looks like.
You will find the source code in my repo: https://github.com/kantoniak/kantoniak-about-me, along with the link to vector icons made by Allan McAvoy.
Update: Plugin is already available here: https://wordpress.org/plugins/kantoniak-about-me/. To install it from the dashboard, go to Plugins/Add New, change search criteria to Author and look for kantoniak.
Plugin structure
We have a standard plugin to handle settings page. It reads from a list of registered social media sites and renders inputs from these entries.
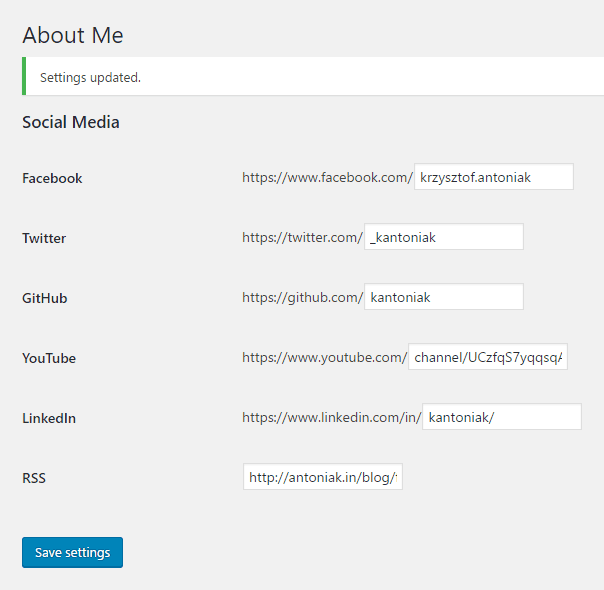
Admin preview
Our plugin class implements the method to return a list of registered websites.
Widget code placement
Widgets are a kind of special things in WordPress. The first thing is that they can be registered in plugins or in the themes, which we didn’t cover yet. In the case of the latter, the widget will be accessible only if the theme is currently activated. Second thing is, WordPress has a WP_Widget class and suggests extending it to implement an own widget.
Extending WP_Widget class
We have a simple class implementing four methods (modified code from register_widget() docs):
Inside the class we have:
- Constructor calling parent constructor
widgetmethod: it will output our HTML, just echo the content inside the member functionupdatemethod for saving options: take both settings instances and return an array which will be saved to the databaseformmethod to render plugin settings in WordPress admin site

Widget form
Connecting widgets with plugin
The engine uses its widget factory class, what means that we are unable to reach the created widget in any reasonable way. (Kudos to WordPress architects). But, there is an awful hack proposed by some users to look for instance in a global array.
With this solution, we can provide widget renderer with the data source, which is our plugin class in this case. You can see simplified example below:
That’s all
Now add some CSS and the plugin is ready! Please, take a look at the repository to better grasp how the widget and the form are rendered.
This post is the last one covering WordPress widgets. We went a long way:
- Creating first plugin structure
- Hooking in for particular posts and categories
- Rendering custom content
- Managing settings
- Applying styles and scripts
- Using shortcodes
- Working with admin media buttons
- Creating widgets
- Submitting to WordPress Plugin Directory
Further reading